
I stopped by to visit one of my favorite blogs. Her ideas are cute and always fun to try out.
This was done by Lisa Young of Add ink and Stamp . I always love to share my finds to others. So they might try it out as well. I would love to see some other ideas for Gift Card Holders!
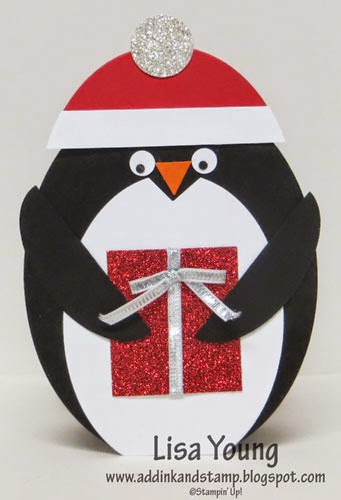

The part that says "place gift card here" is not on the actual project. I added that with photoshop for blogging purposes.
To create this penguin using Oval framelits, you will need:
- 3 Basic Black ovals using the second largest frame lit for the body and pocket.
- 1 Basic Black oval using the smallest oval frame lit - cut in half for the wings
- 1 Whisper White oval using the 3rd largest frame lit for the layer inside the gift card holder
- 1 Whisper White oval using the 4th largest frame lit for the tummy. Punch the notch at the top using the largest arrow from the What's Up arrow punch.
- Real Red card stock for the hat. Use the 3rd largest oval frame lit. Fold the card stock in half and run it through the Big Shot so the fold is not cut.
You will also need to:
- punch a circle from Glimmer paper using the 3/4" circle punch. This is the pom pom.
- Punch eyes using the Owl Punch
- Punch a small arrow using Pumpkin Pie card stock and the What's Up Arrow punch. Trim it for the beak
- Cut a rectangle from Red Glimmer paper for the package.
- cut silver ribbon for the package
- Cut a strip of Whisper White card stock for the stocking cap. I just did the front only.
- A banner for the inside, stamped with Merry Christmas from the Petite Pairs stamp set.
It is important to keep the fold in the hat because that will keep the penguins front and back together. Also, only use a thin line of adhesive around the edge of the pocket so your gift card will fit into the pocket.
All supplies are Stampin' Up!
Stamps: Petite Pairs
Paper: Silver Glimmer, Red Glimmer
Card Stock: Whisper White, Real Red, Basic Black, Pumpkin Pie
Ink: Real Red
Other: Oval Framelits, Big Shot, Silver Ribbon, What's Up arrow punch, 3/4" circle punch


