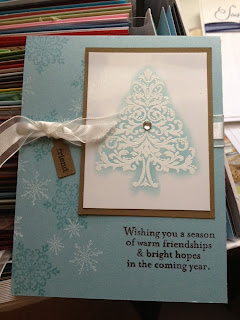
Tutorial for Embossing a Card
When I first started stamping (oh so long ago!) One of the open houses I went to had the embossing table. I had tried before at home but it never seemed to work the right way.
I had went through numerous pieces of cardstock and finally after trying it at an open house I finally got the technique down and stopped going through so many cardstock pieces.
(Thank goodness for scraps!)
This tutorial is for the embossing technique.
All Supplies are Stampin up which you can order from me by clicking HERE.
Supplies: Versamark Watermark Stamp pad,whisper white cardstock,( personal choice) marina Mist stamp pad, finger dauber,heat gun,Stampin up white embossing powder.
I'm using the Christmas Tree from the Stamp Set Snow Swirled,(different tree pictured on my completed card above) versamark
Watermark stamp pad and whisper white cardstock.
Step 1. Take the versamark and apply it to the stamp of your choice.
Making sure its completely covered.
Step 2. Stamp your cardstock pressing down so you know it takes the entire image.
(I've had times where i have lifted the stamp and a corner might be missing that wasnt either inked or pressed down hard enough)
Step 3. Taking your Embossing powder, sprinkle it over the stamped image making sure its completely covered. If you tap it on the Powder tray, you can remove the excess powder.
This is what it should look like after the embossing powder has been applied.
Step 4. Taking your Heat gun, apply heat in circular motions. (if you dont want the card to bend up from the heat, you can use Tinfoil attached to a Clipboard, just attach your card to the clipboard and heat the powder) You can see when it changes from powder form to a more glossy look.
Like this...
Step 5. Taking your finger dauber (or sponge) lightly ink it from your color choice Stampin up ink pad. In circles you'll lightly color in your image.
If you want it to be darker, just go over it again until you get the desired shade you want.
This is what it should look like when you are done.
Now you are finished embossing!
All products used are Stampin up products.


No comments:
Post a Comment